
The Best Materials for Kitchen Splashbacks
A splashback takes more daily punishment than any other kitchen surface. Here is how to choose a material that looks good and genuinely holds up.
 By Priya Nair
30 August 2026 · 6 min read
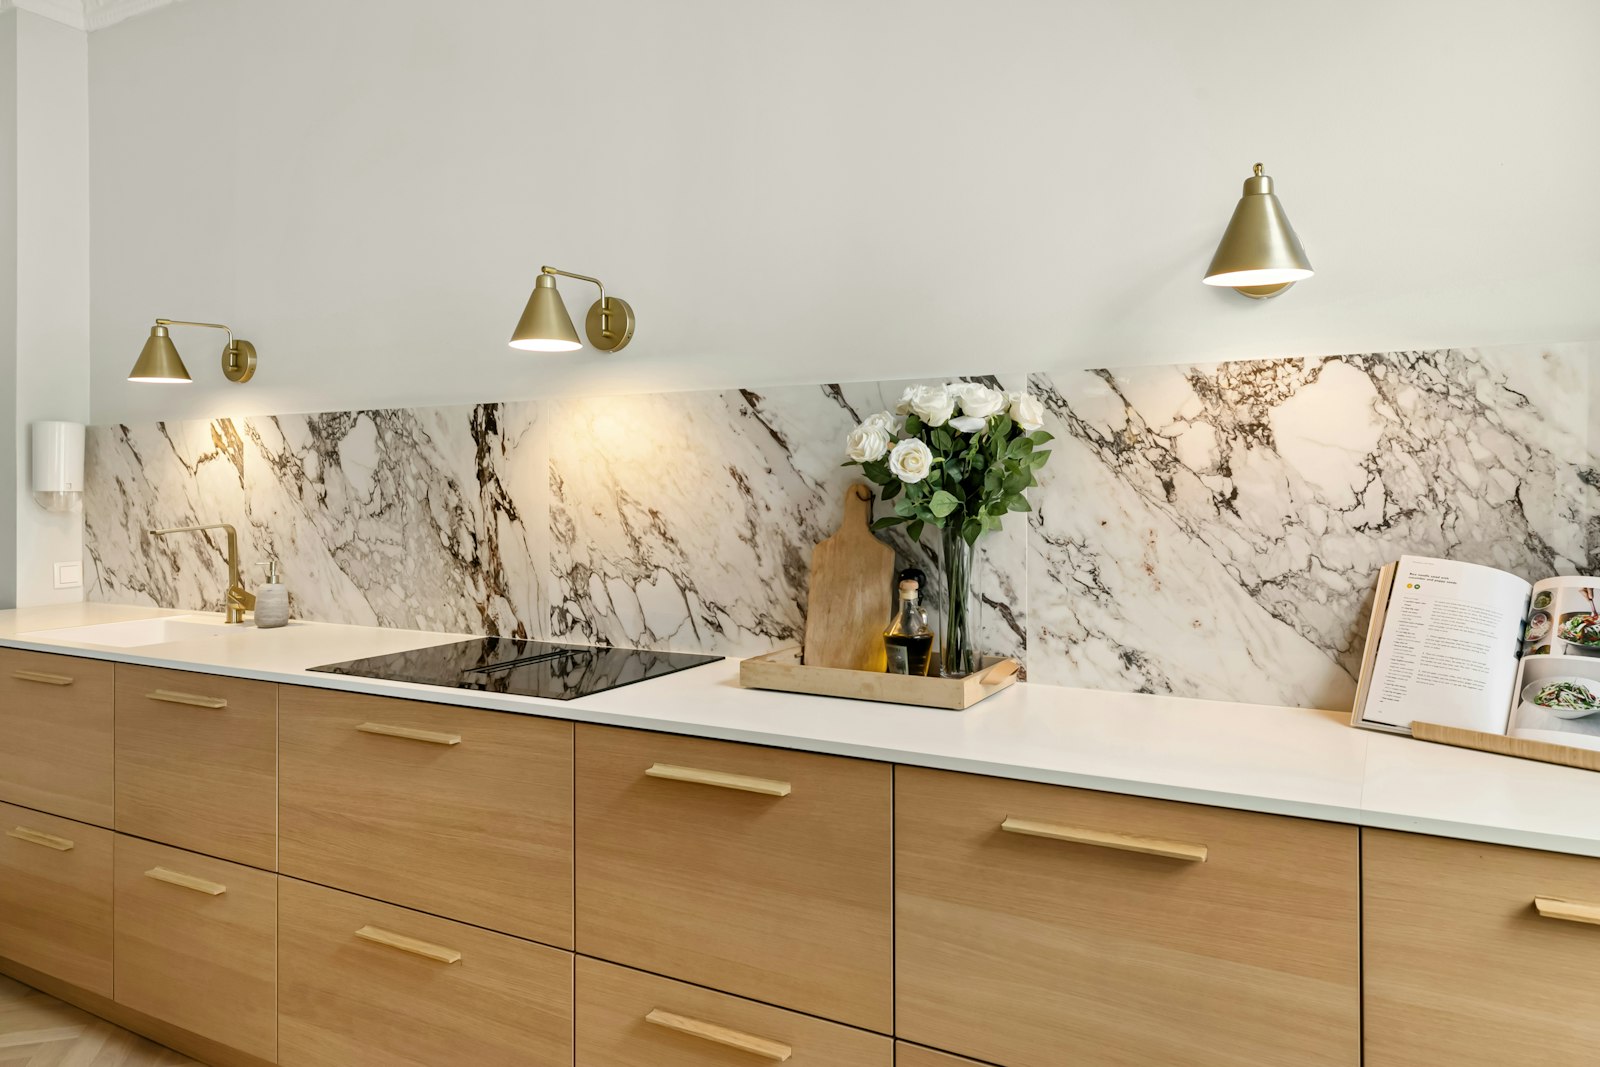
Of every surface in a kitchen, the splashback takes the most concentrated daily punishment — hot oil, steam, the occasional overzealous wok toss — while also sitting directly in the eyeline of anyone cooking, which makes it one of the most visually prominent choices in the entire room. Choosing a splashback material well means balancing genuine durability against the visual impact that makes the investment worthwhile in the first place.
Natural Stone Slabs
A single large slab of natural stone, cut to span the full width of a hob and counter run, has become the signature look of a considered contemporary kitchen, and for good reason — the continuous veining across a bookmatched slab creates genuine visual drama unavailable from tiled alternatives. The trade-off is cost and porosity: natural marble requires sealing and remains vulnerable to acidic staining from citrus, wine or vinegar splashed during cooking, a maintenance reality worth accepting honestly before committing to it directly behind a hob.
Quartzite offers many of marble’s visual qualities with considerably better heat and stain resistance, making it a sensible middle ground for households wanting the stone look without marble’s higher maintenance demands. Engineered quartz, while less visually dramatic than natural stone, offers the most consistent performance of any stone-look option and remains a genuinely sound practical choice.
Tile: Still a Strong Choice
Tile remains underrated as a splashback material, offering the widest range of pattern, colour and texture of any option, along with genuine practicality — individual damaged tiles can be replaced without redoing an entire wall, unlike a single slab. Handmade zellige tile, with its irregular glaze and subtle colour variation, brings a warmth and texture that a perfectly uniform slab cannot match, though it requires careful sealing of the grout lines to prevent staining from cooking splashes over time. For handmade tile at its most irregular and luminous, the quiet luxury of the zellige splashback considers the appeal in more depth.
- Large-format tile — fewer grout lines to clean, closer in appearance to a slab without the cost.
- Handmade zellige or subway tile — genuine texture and character, more maintenance around grout.
- Mosaic tile — the most decorative option, though the density of grout lines makes it the highest-maintenance choice of the tile family.
Glass and Metal
Toughened glass splashbacks, often installed with a coloured or painted backing, offer a genuinely seamless, easy-to-clean surface with no grout lines at all, making them one of the lowest-maintenance options available. The trade-off is that any imperfection in the underlying wall shows through a glass panel more than it would behind tile or stone, so wall preparation needs to be considerably more precise before installation.
Stainless steel, long associated with professional kitchens, is enjoying a genuine return to residential use, particularly among households who cook frequently and prioritise practicality over decorative pattern. It resists heat, acid and staining better than almost any other material on this list, though fingerprints and water spots show readily on a polished finish — a brushed or textured steel finish hides daily marks considerably better than a mirror-polish surface.
A Singapore kitchen designer who specifies splashbacks for busy home cooks offers a useful filter: “Ask how often you actually cook with oil at high heat. That answer decides the material far more reliably than the mood board does.”
Matching the Splashback to Cooking Habits
Households that cook frequently with wok-based, high-heat techniques common in Singapore kitchens should weight heat and stain resistance more heavily than pure visual drama, since a beautiful but high-maintenance material will show wear quickly under genuinely heavy daily use. Households that cook more occasionally, or primarily at lower heat, have considerably more latitude to prioritise appearance, since the material will face less punishing daily conditions. Our guide to kitchens designed for people who cook covers this practical-first approach to kitchen design more broadly.
Coordinating With Cabinetry and Counters
A splashback rarely stands alone visually, and it is worth choosing it in relation to the counter and cabinetry it sits between rather than as an isolated decision. Matching the splashback to the counter in the same stone creates a seamless, continuous look that reads as considered and expensive; a deliberately contrasting splashback — a fluted stone or handmade tile against a plainer counter — introduces texture and interest without overwhelming the room. Our piece on the best materials for a timeless kitchen and our guide to choosing timeless kitchen cabinetry both offer further guidance on getting this coordination right.
Grout colour, in a tiled splashback, is a small detail that has an outsized effect on the finished look. A grout matched closely to the tile colour creates a calm, unified surface that emphasises the material itself; a contrasting grout draws attention to the pattern and joinery, which suits a more graphic, decorative tile but can feel busy behind a stretch of counter that is already visually active. Testing a small sample section with the intended grout colour, ideally under the kitchen’s actual lighting, avoids a costly surprise once the full wall is installed.
Installation Details Worth Checking
The gap between counter and the underside of upper cabinetry determines a splashback’s exact height, and it is worth measuring this precisely before ordering a slab or tile rather than assuming a standard dimension will apply. Extending a splashback slightly higher behind a hob specifically — even just an additional 10 to 15cm — gives extra protection in the zone that genuinely needs it most, without necessarily extending the full height treatment across the entire counter run, which can add unnecessary cost.
Edge finishing deserves attention too, particularly where a splashback meets a window sill, cabinetry or an open shelf. A clean mitred edge, rather than a visible seam or unfinished cut, is the difference between a splashback that looks professionally finished and one that reads as an afterthought, however good the material itself.
A Surface Worth the Investment
Because a splashback sits permanently in view and is genuinely difficult to replace without disrupting the whole kitchen, it rewards careful material selection from the outset far more than almost any other kitchen surface. For the kitchen island it often complements, our guide to the kitchen island, reconsidered is a useful companion read, and our Homes & Culture section carries substantially more on building a kitchen that performs as well as it photographs.
Priya tours the homes most people only glimpse from the road, and asks how they are really lived in.


